Dressmaker cutting guide
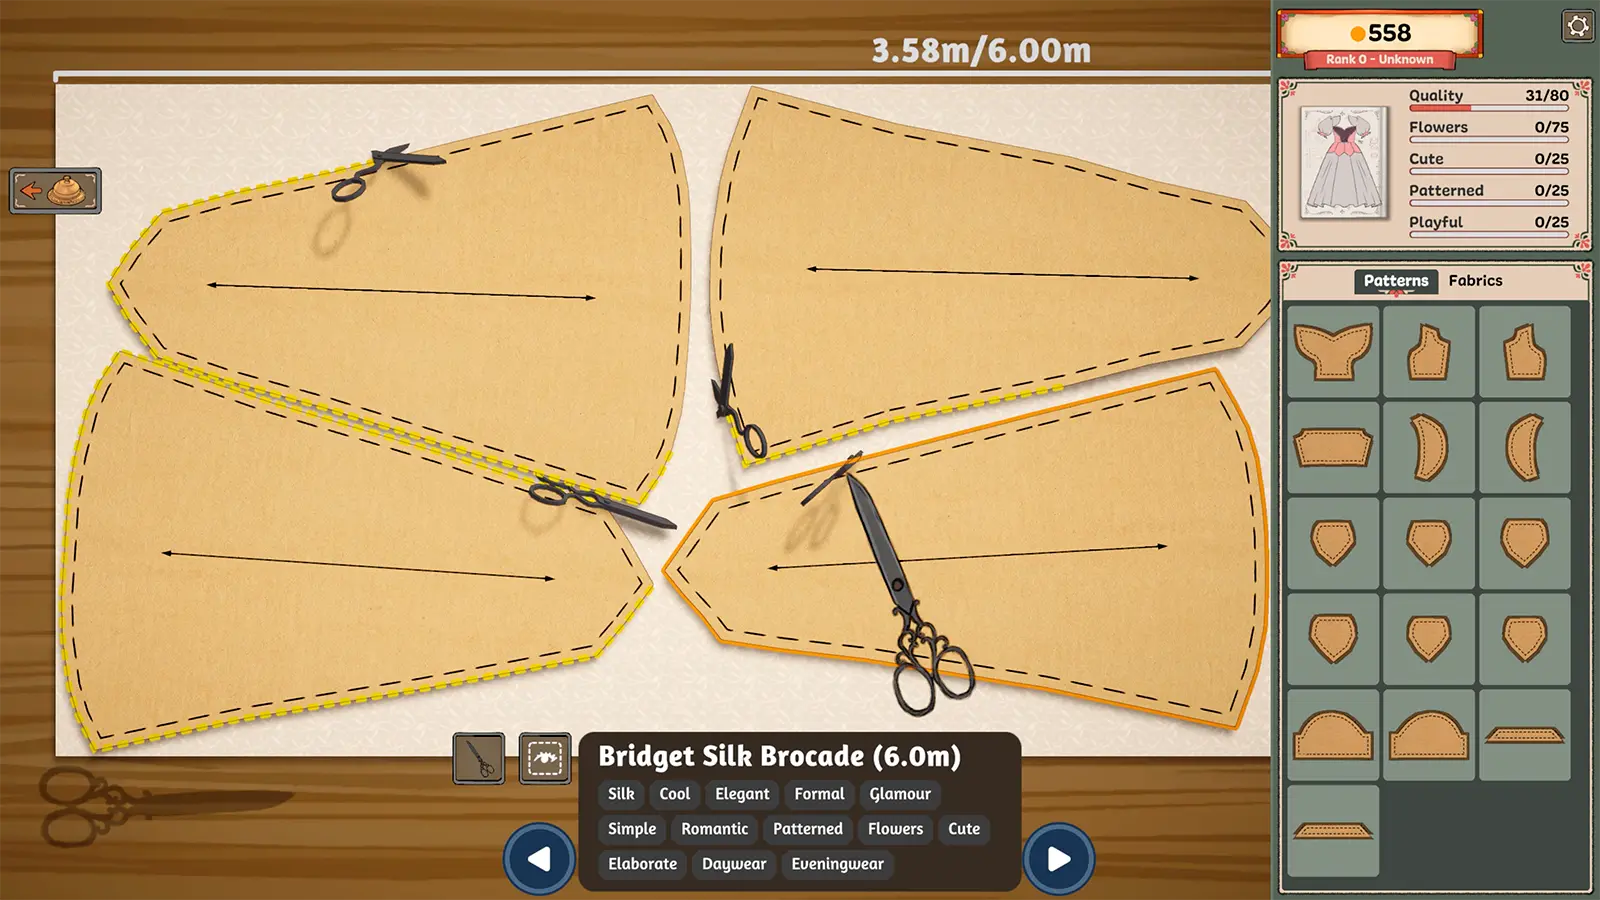
- Each pattern piece has a grain arrow; how you align it changes how the fabric looks on the dress.
- Rotate pieces with the mouse wheel (it no longer rotates pieces while you hover the inventory, since Build 410).
- The counter at the top shows metres used out of the length you own.
- Pieces are drafted to each customer's measurements, so a pattern is not the same size for everyone.
The cutting room is where a design turns into real panels. It rewards care in two ways: better-looking dresses, and less fabric bought per commission.
Laying out pieces
After you press Draft Pattern in the sketchbook, the pieces wait in the inventory on the right. Drag each one onto your fabric, rotate it, and cut around the dashed line.
- Rotate with the mouse wheel. Since Build 410, the wheel no longer rotates a piece while the cursor is over the inventory, so scrolling the list is safe.
- Hover a piece in the inventory to see where it goes on the mannequin (Build 410).
- Keep an eye on the metres used counter at the top (for example 3.58 m / 6.00 m).
Grain and bias
Every pattern piece has an arrow for the grain line. The Steam page puts it plainly: whether a piece is aligned to the grain or cut on the bias, the arrangement you choose is what appears on the final dress. Stripes, checks, brocades and prints follow the angle you cut at.
- On the grain: the fabric’s pattern runs straight up and down the panel. It is the safe choice for most pieces.
- On the bias: the piece sits at an angle to the weave, so patterns run diagonally. Use it on purpose for a skirt or a feature panel.
Whether grain placement also affects your Quality score has not been confirmed. We will update this section once we have tested it on Build 410.
Made to measure
Dressmaker drafts patterns to each customer’s measurements. The mannequin is adjusted to the character, and the pieces are sized to fit. A skirt for one customer may need noticeably more fabric than the same skirt for another. Always check the metre estimate in the sketchbook before buying.
Saving fabric
- Nest curved pieces into each other’s curves, as with the four skirt panels in the screenshot above.
- Cut large pieces first, then fit small pieces such as collars and cuffs into the gaps.
- If you are short, cut what you can and buy only the missing metres rather than a whole new length.
Next: take your panels to the sewing machine.
Frequently asked questions
What does cutting on the bias do in Dressmaker?
Placing a piece diagonally to the grain changes how the weave and any print run across that panel on the finished dress. The Steam page states that whatever arrangement you cut is what appears on the final dress.
Why do my patterns change size between customers?
Each character is measured and the mannequin is adjusted to their body, and pattern pieces are drafted from those measurements.